
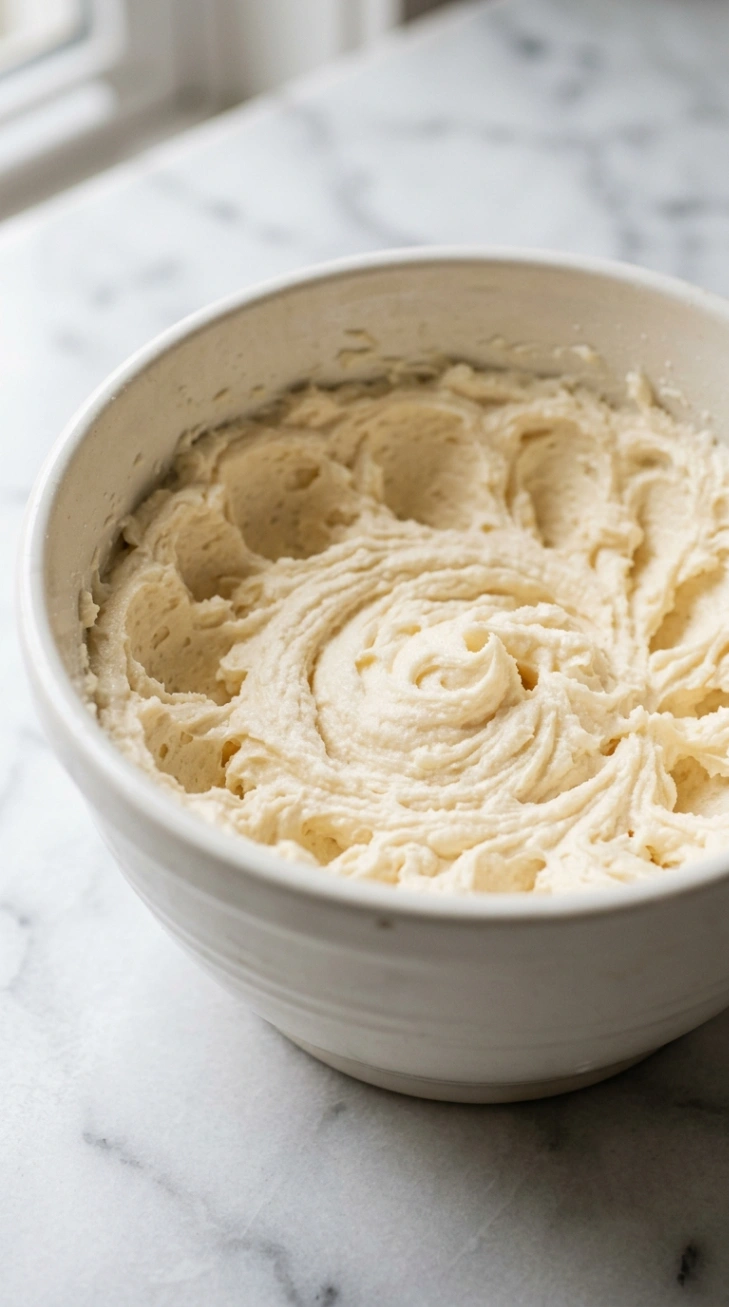
What Creaming Butter and Sugar Really Means (And Why It Matters)
If you have ever pulled a cake out of the oven and watched it sink in the middle, the problem probably started long before the oven. The same goes for a cookie that felt more like a hockey puck than a treat. It started at the mixing bowl, in the first minute of the recipe. That’s when you were told to cream butter and sugar together.
Most bakers skim past this instruction. It sounds simple. Butter, sugar, mix, done. But creaming butter and sugar is not a throwaway step. It is the foundation that every cake, cookie, and muffin recipe is built on. Get it right and your baked goods rise evenly, hold a soft crumb, and taste balanced. Get it wrong, and no amount of good flour or perfect oven temperature will save you.
So what does it mean to cream butter and sugar? In plain terms, it means beating softened butter and sugar together until the mixture turns pale, light, and fluffy. During this process, the sharp edges of the sugar granules cut tiny air pockets into the butter. Those pockets trap air, and that trapped air gives your cake its lift and your cookies their tender bite. According to King Arthur Baking, creaming uses sugar to aerate the butter. This fills it with bubbles that later capture the gasses released by baking soda or baking powder. That’s exactly why a rushed or half-hearted creaming job leads to flat, dense results.
This guide walks you through the full process. You will learn how long to cream butter and sugar, and what the mixture should look like when it is ready. You’ll also learn how to do it by hand if you do not own a mixer, and how to fix the most common mistakes before they ruin your bake. By the end, creaming butter and sugar will stop being a mystery step. It will start being the part of the recipe you actually feel confident about.
Why Learning to Cream Butter and Sugar Properly Pays Off in Every Bake
Learning to cream butter and sugar correctly is not just about following instructions. It changes the outcome of your baking in ways you can taste and see.
Lighter, fluffier texture. Properly creamed butter and sugar traps air that expands in the oven’s heat. That expansion is what separates a fluffy cake from a dense, heavy one. Skip this step or rush it, and your batter starts with fewer air pockets, so your cake has less room to rise.
Even sugar distribution. When you cream butter and sugar together, the sugar breaks into finer particles and spreads evenly through the fat. This prevents gritty spots in your finished cookies and gives cakes a smooth, uniform crumb.
Better structure for the rest of your ingredients. A well-creamed butter and sugar mixture acts like glue. It holds eggs, flour, and leavening agents together in a stable base, so your batter does not separate or curdle when you add liquid ingredients.
More consistent baking results. Once you understand what properly creamed butter looks like, you stop guessing. You will know exactly when to stop mixing, which means fewer failed batches and more repeatable results, recipe after recipe.
A skill that transfers across your whole baking repertoire. Creaming butter and sugar shows up in shortbread, pound cake, sugar cookies, brownies, and countless cake recipes. Master it once, and you carry that skill into dozens of other bakes.
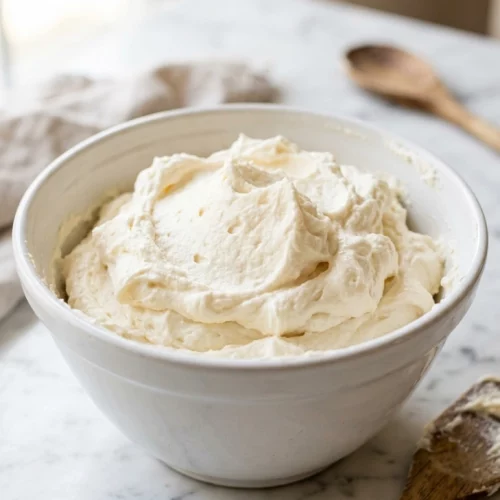
How to Cream Butter and Sugar Properly

Equipment
- Stand mixer with paddle attachment (or electric hand mixer)
- Large mixing bowl (if using a hand mixer)
- Rubber spatula
Ingredients
- 1 cup 2 sticks / 227g unsalted butter, softened to room temperature
- 1 cup 200g granulated sugar
- 1 pinch salt optional, if your recipe doesn’t call for salt separately
Instructions
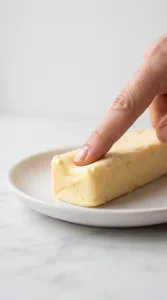
- Soften the butter at room temperature for 30 to 60 minutes, until it gives slightly when pressed but still holds its shape.

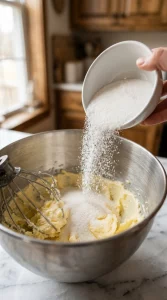
- Place the softened butter in the mixing bowl and add the sugar on top.
- Mix on low speed for about 30 seconds to combine.
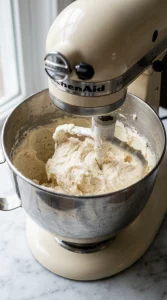
- Increase to medium speed and beat for 2 to 4 minutes (stand mixer) or 4 to 6 minutes (hand mixer).
- Watch for the color to lighten from deep yellow to pale cream, and the texture to turn light and airy.
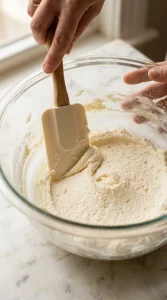
- Stop once or twice to scrape down the sides of the bowl with a spatula.
- Stop mixing once the mixture looks pale, fluffy, and roughly doubled in volume, with no visible butter chunks.
Notes
- Butter that’s too cold or too warm will not aerate properly, always start at true room temperature.
- Add sugar in two additions for extra air incorporation if you want a lighter result.
- Over-mixing can trap too much air and cause spreading or sinking once baked, stop as soon as the mixture looks pale and fluffy.
Smart Tips for Perfect Results, Plus Vegan and Gluten-Free Swaps
Butter and Sugar Basics
Use room temperature butter, always. This is the single most repeated tip among professional bakers, and for good reason. Butter that is too cold resists aeration. Butter that is too warm or partially melted collapses the air pockets before they can form.
Choose your sugar with intention. Granulated sugar is the standard choice because its crystals are sharp enough to cut through the butter efficiently. Superfine sugar creams even faster since the smaller crystals need less time to break down. Powdered sugar, on the other hand, dissolves too quickly. It will not create the same air pockets, so avoid it for classic creaming.
Timing It Right
Time your creaming to your recipe. Cookies generally need a shorter creaming time, around 2 to 3 minutes. Too much air can cause them to spread too thin during baking. Cakes usually benefit from a longer creaming time, around 4 to 5 minutes, for maximum lift.
Vegan and Gluten-Free Swaps
For vegan baking, substitute a stick-form plant-based butter rather than a tub spread. Tub spreads often carry extra water content, which throws off the ratio of fat to liquid in your recipe. Stick-style vegan butters made mostly from coconut oil or a blend of plant oils tend to cream far more like dairy butter. This gives you a similar light and fluffy result.
For gluten-free baking, the creaming method itself does not change, since it involves only butter and sugar. What changes is the flour you add afterward. Choose a gluten-free flour blend designed for cakes and cookies. These blends already account for the missing structure that gluten normally provides. Pair your properly creamed butter and sugar with a well-tested gluten-free blend, and you will still get a light, tender crumb.
Equipment Alternatives
Try a hand mixer if a stand mixer feels excessive. A hand mixer with a set of beater attachments works well for small batches. It gives you more control over movement around the bowl, which helps prevent unmixed pockets near the edges.
Common Creaming Mistakes and How to Fix Them Before They Ruin Your Bake
Temperature Mistakes
Mistake: Using cold butter. Cold butter will not soften into an even texture no matter how long you mix it. Instead of trapping air, it just breaks into small chunks. Fix this by planning ahead and setting your butter out well before you start, or by cutting it into small cubes to speed up softening.
Mistake: Using melted or overly warm butter. Melted butter cannot hold air pockets at all, since it lacks the semi-solid structure needed to trap bubbles. If your butter has gone soft and glossy or has started pooling liquid, put it back in the fridge for 10 minutes before trying again.
Mixing Time Mistakes
Mistake: Under-creaming. If you stop mixing too soon, your batter will still look yellow and slightly grainy rather than pale and fluffy. This leads to dense, flat baked goods because there is not enough trapped air for proper rise. Give the mixture the full recommended time, and trust the visual cues over the clock.
Mistake: Over-creaming. It is possible to cream butter and sugar for too long, especially with a powerful stand mixer. Over-creaming can incorporate so much air that your cookies spread too much or your cake collapses slightly after baking, since the structure cannot support all the trapped air once heat hits it. If your mixture starts to look overly light, almost whipped, and slightly separated, you have gone too far.
Technique Mistakes
Mistake: Not scraping the bowl. Skipping this step means some of your butter never gets fully incorporated. Scrape the bowl at least once during creaming, and once more after adding sugar, to keep the mixture uniform.
Personal tip: I always run my finger along the side of the bowl about two minutes in, just to check for any unmixed streaks of butter. It takes five seconds and saves you from a lumpy batter later on.
The One Trick Professional Bakers Use for Extra-Fluffy Results
Here is a trick that is not always mentioned in standard recipes: add your sugar in two additions instead of dumping it all in at once. Start by creaming the butter alone for about 30 seconds to loosen it up, then add half the sugar and mix until combined. Scrape the bowl, add the remaining sugar, and continue mixing until the full amount is pale and fluffy.
This staged approach gives the sugar crystals more contact time with the butter’s surface, which creates more air pockets overall than mixing everything together in one go. Pastry chef Katherine Sprung, speaking with Chowhound, notes that the entire goal of creaming is to build a mixture that holds tiny air pockets capable of giving the final bake a proper lift, and staged sugar addition is one of the simplest ways to maximize that effect without any special equipment.
A second trick worth trying: chill your mixing bowl in the freezer for five minutes before you start if you are baking in a warm kitchen. This keeps your butter from softening too fast mid-mix, which matters most in summer months or in kitchens without air conditioning.
What to Bake Once You Have Mastered Creamed Butter and Sugar
Once you feel confident with this technique, put it to work across a range of baked goods.
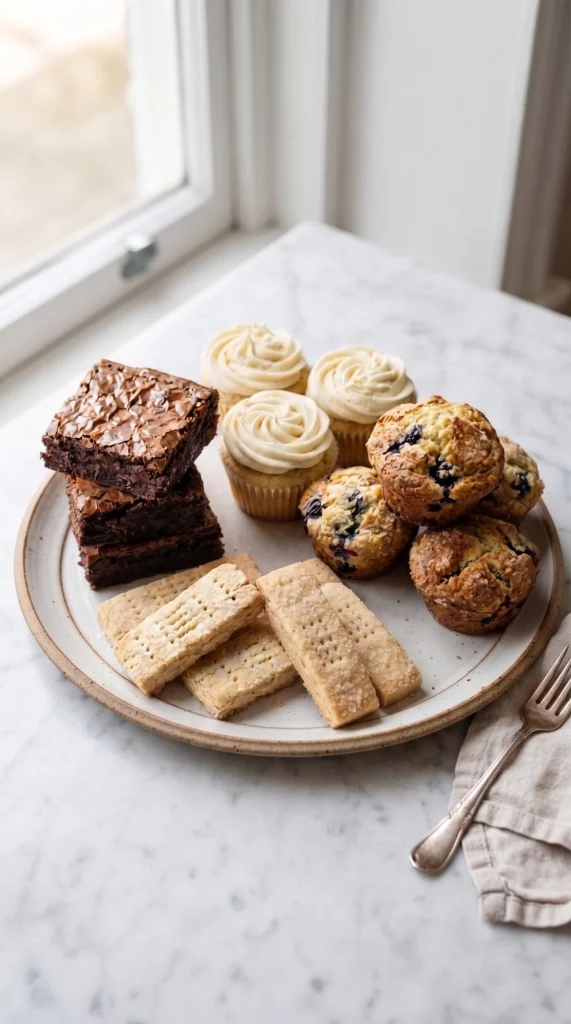
- Classic sugar cookies: Properly creamed butter and sugar gives these a soft center with slightly crisp edges.
- Brownies: This recipe leans heavily on the creaming step for its dense yet tender crumb, so extra care here pays off directly.
- Chocolate chip cookies: A shorter creaming time here keeps the cookies from spreading too thin, while still giving them a chewy bite.
- Vanilla or yellow layer cake: A full 4 to 5 minutes of creaming builds the light, even crumb this cake is known for.
- Shortbread: Even though shortbread uses less sugar than cake batters, creaming still matters for its crumbly yet tender texture.
- Muffins with a creamed butter base: Skip the usual melt-and-mix muffin method and use creamed butter and sugar instead for a bakery-style, tender crumb.
Serve your baked goods slightly warm when possible, since many butter-and-sugar based recipes taste their best within the first day or two, while the texture from proper creaming is still at its peak.
Cream Butter and Sugar With Confidence Every Time
Creaming butter and sugar looks like a small, forgettable step in a much longer recipe, but it carries more weight than almost any other instruction on the page. Room temperature butter, the right sugar, a few focused minutes with your mixer, and a bit of attention to color and texture are all it takes to get this step right.
Once you understand what correctly creamed butter and sugar looks like, and once you know how to spot and fix the common mistakes, this step stops being intimidating. It becomes second nature, the same way measuring flour or preheating your oven is second nature. Your cakes will rise taller, your cookies will bake more evenly, and your confidence in the kitchen will grow along with them.
Your Questions About Creaming Butter and Sugar, Answered
What does it mean to cream butter and sugar together?
Creaming butter and sugar together means beating softened butter with sugar until the mixture turns pale and fluffy. This process works air into the butter, using the sugar’s sharp crystal edges to cut tiny pockets throughout the fat. Those air pockets later expand in the oven, giving your baked goods lift and a lighter texture.
Can you cream your butter and sugar too much?
Yes. Over-creaming is a real risk, especially with a strong stand mixer. If you beat the mixture for too long, it can trap more air than the batter’s structure can support once baking soda, baking powder, eggs, and flour go in. The result is often a cookie that spreads too flat or a cake that rises quickly, then sinks as it cools. Stick to the recommended 2 to 5 minutes depending on your recipe, and stop once the mixture looks pale and fluffy rather than continuing indefinitely.
What does correctly creamed butter and sugar look like?
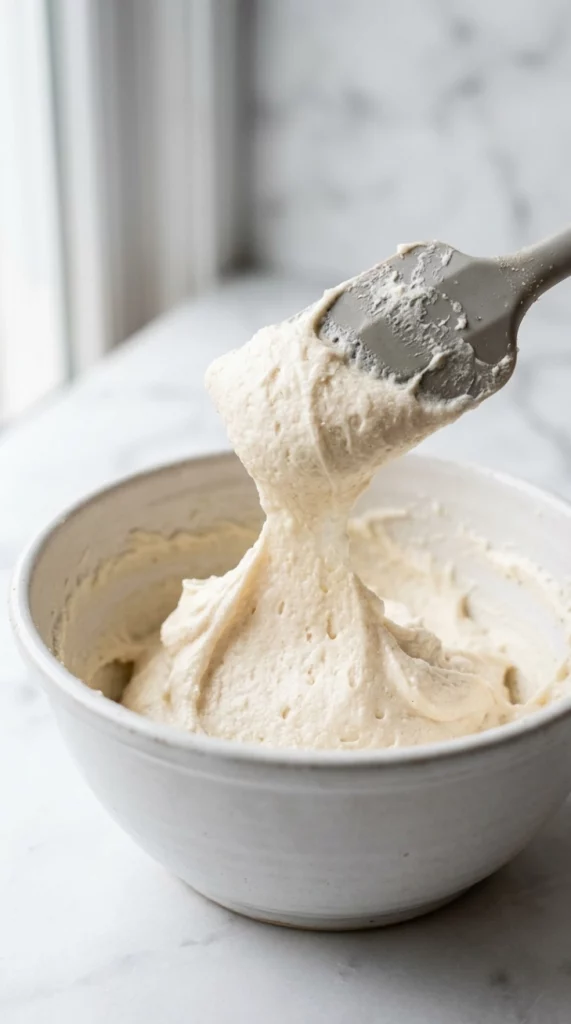
Correctly creamed butter and sugar looks pale, almost creamy in color, and noticeably fluffy compared to the deep yellow, dense texture of raw butter. There should be no visible lumps or chunks of butter left, and the mixture should have roughly doubled in volume. If you run a spatula through it, it should hold soft peaks rather than sliding flat immediately.
Do you cream butter and sugar with a whisk or spatula?
For most recipes, a paddle attachment on a stand mixer or the beaters of a hand mixer work best, since they combine speed with enough resistance to properly cut sugar into the butter. A whisk is generally too thin and light to handle the thicker consistency of butter, so it struggles to build the same air pockets. A spatula works fine for hand-mixing in a pinch, or for scraping down the bowl between mixer passes, but it is a slower and more labor-intensive method than using an electric mixer or a paddle attachment.
You may also like these other cooking ideas:
Chicken Tagine Crockpot, Ultimate Moroccan Delight
knew the two-addition sugar trick! Always just dumped it all in at once. Trying this on my next batch of sugar cookies, makes total sense why staged mixing would create more air pockets.
This explains SO much. I’ve definitely been guilty of over-creaming with my stand mixer, wondering why my cookies spread out so thin. Going to actually time it and watch for the pale/fluffy stage instead of just letting it run
The tip about chilling the bowl in summer is genius… my kitchen turns into a sauna in July and I always wondered why my butter got weird mid-mix. Bookmarking this!